
Creating a leather tote bag at home is a rewarding and practical project. With the right materials and a few tools, you can design a stylish and durable accessory that fits your needs. This guide will explain how to make a leather tote bag step-by-step, helping you create a custom piece you’ll love to carry.
Easy DIY Leather Tote Bag
Making a leather tote bag may seem complex, but it’s simpler than you think. With patience and attention to detail, you can craft a high-quality tote bag that’s both functional and fashionable. This DIY project allows you to personalize your bag’s size, color, and design to match your style.
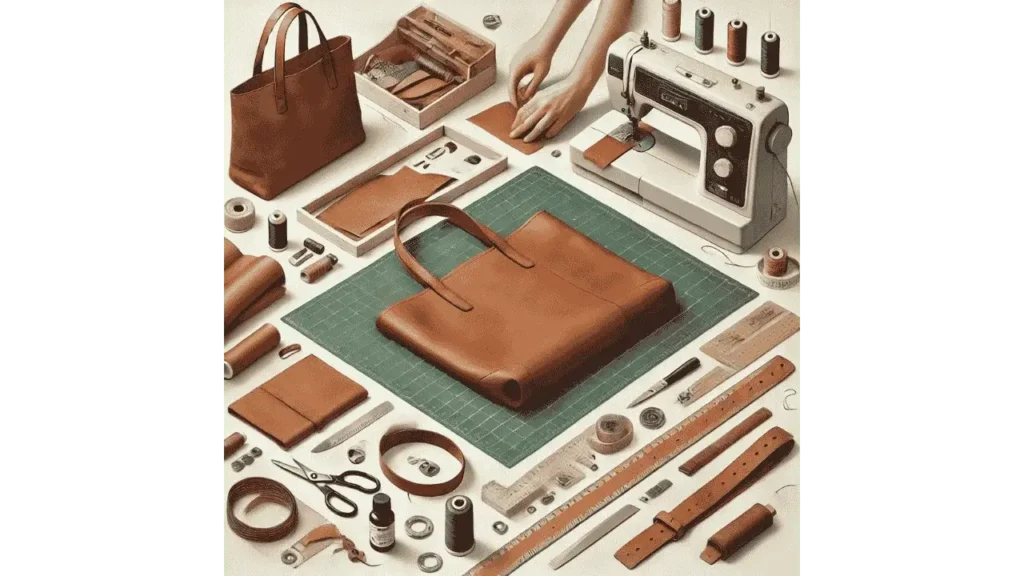
Materials List
For this project, you’ll need a full-grain leather hide (choose your preferred color and thickness), strong waxed thread, leather glue, and metal rivets or snaps for added strength and style. Optional materials include a magnetic clasp or zipper for closure and leather conditioner to keep the bag soft and protected.
Tools List
Gather these essential tools: a rotary cutter or utility knife, metal ruler or measuring tape, cutting mat, leather hole punch, stitching needles, edge beveler, and a mallet or hammer. Having these tools ready will make the process smoother and more efficient.
Learn More: Are Vera Pelle Bags Real Leather?
Steps to Follow
Step 1: Measure and Cut the Leather
Decide the size of your tote bag. Use a metal ruler and rotary cutter to measure and cut two equal rectangular pieces for the front and back panels. Cut two thinner strips for the handles. Make sure the edges are straight and clean for a polished look.
Step 2: Punch Holes for Stitching
Use a leather hole punch to make evenly spaced holes along the edges where the panels will be stitched together. Do the same for the handles, where they will attach to the bag. This step ensures even stitching and strong seams.
Step 3: Attach the Handles
Position the handles on both panels and secure them using rivets or by stitching them in place. Double-check the alignment to ensure the handles are evenly placed. If you prefer, reinforce the handle attachment with a small amount of leather glue for added strength.
Step 4: Stitch the Bag Together
Align the front and back panels, then stitch along the sides and bottom using waxed thread and a saddle stitch for durability. Pull the thread tight but avoid overtightening to prevent puckering. Finish by trimming any excess thread and smoothing the edges with an edge beveler.
Cautions
Work slowly and carefully when cutting and stitching leather to avoid mistakes. Always use sharp tools for clean cuts and handle them with care. Test leather glue and finishes on scrap pieces before applying them to the final product to prevent damage. Wear protective gloves if necessary to avoid injury.
Key Takeaways
Making a leather tote bag at home is a straightforward project that allows you to create a stylish and durable accessory. By using quality materials, precise stitching, and careful construction, you can craft a tote that is both functional and fashionable. Take your time, follow each step carefully, and enjoy the satisfaction of carrying a handmade leather bag.

- How to Wear an Oversized Leather Jacket? Style Tips for a Casual Look - August 6, 2025
- How to Fold a Leather Jacket? - August 5, 2025
- How Should a Leather Jacket Fit a Woman? - August 1, 2025

