Leather boots can develop cuts over time due to sharp objects or regular wear. Addressing the damage promptly helps prevent further deterioration and ensures the boots maintain their durability. Whether the cut is minor or more severe, using the right techniques can help restore the boot’s integrity and appearance effectively.
Assessing the Damage
Before starting the repair, carefully examine the cut to determine its severity. Small surface cuts can usually be fixed with adhesive, while deeper cuts may require reinforcement with filler compounds. Understanding the extent of the damage will help in selecting the appropriate repair method and avoiding further deterioration. Taking the time to assess the damage ensures the repair process is both effective and long-lasting.
Essential Tools and Materials
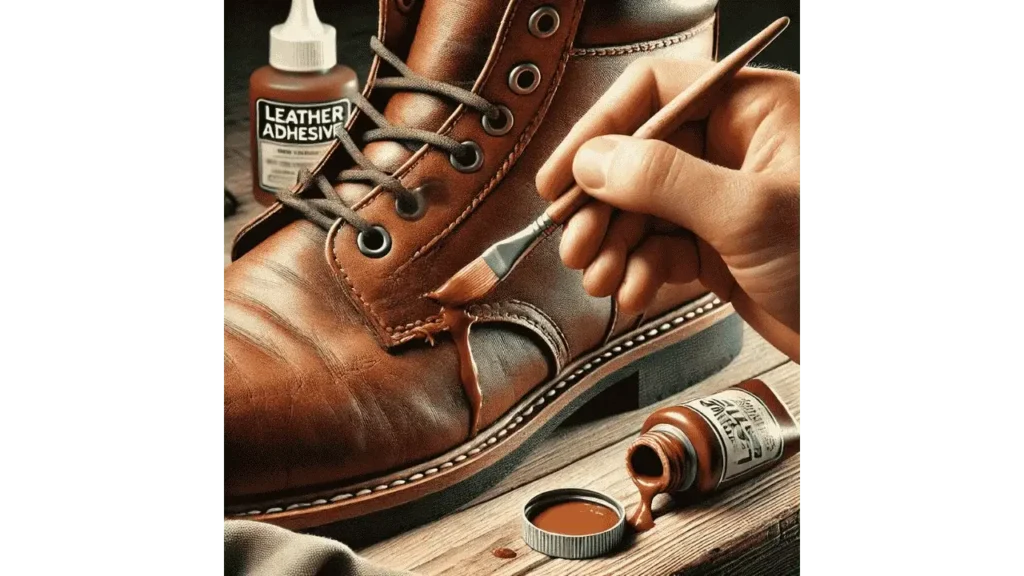
Leather Adhesive
A strong, flexible, and waterproof adhesive is crucial for bonding the cut edges securely. It helps prevent the leather from splitting further while maintaining its natural flexibility. Choosing a high-quality adhesive ensures a durable and long-lasting repair.
Filler Compound
Leather filler compounds are useful for repairing deeper cuts by filling in gaps and providing a seamless surface. These compounds blend with the leather, restoring both appearance and function. Applying filler correctly helps create a smooth finish that blends well with the surrounding leather.
Sandpaper and Buffing Tools
Fine-grit sandpaper is essential for smoothing the repaired area once the adhesive and filler have dried. Buffing tools help restore the natural texture and finish of the leather, ensuring the repair is not visible. Proper sanding and buffing contribute to a professional-looking result.
Leather Dye and Finish
Restoring the boot’s color is an important final step in the repair process. Using a matching leather dye helps blend the repaired area with the rest of the boot, while a protective finish adds an extra layer of durability. Proper finishing ensures that the repair remains intact over time.
Step-by-Step Guide to Repairing a Cut in Leather Boots
Cleaning the Damaged Area
Start by cleaning the damaged area with a damp cloth and mild soap to remove dirt, oils, and debris. Ensuring the surface is clean allows the adhesive and filler to bond effectively. Let the boots dry completely before proceeding to the next step.
Applying Leather Adhesive
Carefully apply leather adhesive along the edges of the cut, pressing them together firmly. Hold the cut in place until the adhesive sets according to the manufacturer’s instructions. This step is crucial in ensuring a strong and lasting bond.
Filling the Cut with Leather Filler
Once the adhesive has dried, apply a thin layer of leather filler to cover any remaining gaps. Spread the filler evenly using a spatula or similar tool, and allow it to dry thoroughly before sanding. Proper application ensures a seamless blend with the leather.
Smoothing and Buffing the Surface
After the filler has dried, use fine-grit sandpaper to smooth the repaired area. Gentle buffing with a soft cloth restores the natural sheen of the leather, blending the repaired section with the rest of the boot. This step enhances the overall appearance of the repair.
Restoring Color and Protecting the Leather
Apply a leather dye that matches the original shade of the boots. Once the dye has dried, finish by applying a protective coating to safeguard the repair from future damage. This helps maintain the boots’ original appearance and prevents further deterioration.
Preventing Future Damage
Proper care and maintenance are essential to prevent future cuts and damage to leather boots. Regular conditioning keeps the leather flexible, reducing the risk of cracks and cuts. Storing the boots in a cool, dry place and avoiding exposure to sharp objects will help maintain their condition for longer.
Final Takeaways
Fixing a cut in leather boots is a straightforward process that requires the right tools and techniques. Cleaning, bonding, and finishing the damaged area help restore the boots’ durability and appearance. Regular maintenance, such as conditioning and careful storage, will ensure the boots remain in great condition and ready for use.

- How to Wear an Oversized Leather Jacket? Style Tips for a Casual Look - August 6, 2025
- How to Fold a Leather Jacket? - August 5, 2025
- How Should a Leather Jacket Fit a Woman? - August 1, 2025