Leather gloves aren’t just stylish; they’re a practical investment, and taking care of them makes a huge difference in how long they last. Over time, natural oils in the leather evaporate, especially if you wear them often or expose them to the elements. I’ve learned that a little regular conditioning keeps gloves soft, flexible, and looking good. Let’s talk about how to keep them in top shape without making common mistakes.

Why Conditioning Leather Gloves is Essential?
Hydration and Protection
Leather is natural, and like skin, it needs moisture to stay healthy. If gloves dry out, they become stiff, brittle, and prone to cracking. Regular conditioning replenishes lost oils, keeping them supple and more resistant to damage. It also helps maintain their rich color and natural sheen.
Guard Against Weather and Use
Exposure to sun, rain, snow, and sweat all take a toll. Conditioning acts as a barrier, helping leather resist environmental stress. Plus, it keeps gloves comfortable to wear, even in changing conditions.
What Do You Need to Condition Leather Gloves?
Choosing the Right Leather Conditioner
Not all conditioners are the same. Avoid anything petroleum-based, as it can weaken the leather over time. Look for formulas with beeswax or lanolin, which nourish without clogging pores. High-quality leather creams or balms work best.
Learn More: Cleaning Leather Boxing Gloves
Tools for Application
A soft, clean cloth or sponge works perfectly for applying conditioner. A soft-bristled brush can help reach textured or stitched areas, making sure the treatment is even.
Prep Before You Start
Always clean the gloves first. A damp cloth is enough for light dirt, but for tougher spots, a mild leather cleaner helps. Let the gloves dry fully at room temperature before applying conditioner.
Step-by-Step Guide to Conditioning
Step 1: Wipe Down the Gloves
Start by removing any surface dust or grime with a damp cloth. For stubborn stains, use a gentle leather cleaner.
Step 2: Apply Conditioner
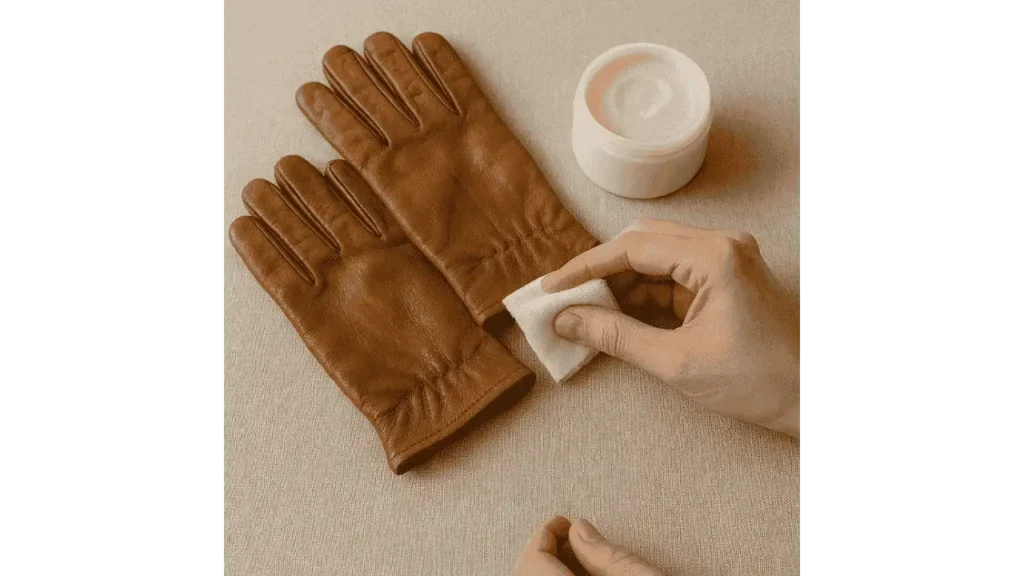
Put a small amount of conditioner on your cloth or sponge. Rub it into the leather in gentle, circular motions, covering all areas evenly. Pay attention to creases and flex points.
Step 3: Let it Soak In
After conditioning, let the gloves sit for a few hours or overnight, so the leather can absorb the moisture properly. Don’t rush this step.
Step 4: Buff to Restore Finish
Once the conditioner has been absorbed, use a clean, dry cloth to buff the gloves. This removes excess product and brings back their natural shine.
“Over-conditioning can leave gloves greasy and trap dirt. Less is more when it comes to leather care,” says Claire Weller, a leatherwear consultant from London.
How Often to Condition?
For daily-wear gloves, conditioning every few weeks keeps them supple. Occasional-use gloves can go a few months between treatments. In harsh weather, more frequent conditioning might be needed to prevent drying out.
Common Mistakes to Avoid
Using too much product or applying it too often can clog the leather’s natural pores, leading to a sticky or heavy feel. Avoid harsh or silicone-based products, which can damage leather. Also, never condition dirty gloves, always clean them first to avoid trapping grime.
Final Takeaways
Conditioning leather gloves isn’t hard, but it does take care. Choose the right products, apply them with patience, and resist the urge to overdo it. Regular care keeps gloves soft, durable, and looking great. Trust me, it’s worth the extra time to keep your favorite pair lasting for years.
- How to Wear an Oversized Leather Jacket? Style Tips for a Casual Look - August 6, 2025
- How to Fold a Leather Jacket? - August 5, 2025
- How Should a Leather Jacket Fit a Woman? - August 1, 2025


